If you have managed to get yourself a non-lucrative visa (or other long-term visa), one of the first things you will likely notice is that the visa is only valid for approximately three months. When you applied, you did so with the belief that it would be valid for a year, so what’s with this three month nonsense?
Don’t worry, that’s just part of the process. Upon arriving in Spain, you basically have a month to make an appointment to convert your temporary non-lucrative visa into a one-year residency. To do so, you need to register at the appropriate place, at which point they will receive a “tarjeta de extranjero”, or foreigner’s card (TIE for short).
To receive the card, you typically need the following:
- One colour photo on a white background, in European size. I brought a photo from Canada that I explicitly asked to be 40mmx30mm (the size of a European passport photo). I wasn’t sure that would work, but they accepted it just fine.
- Your passport with your visa inside
- A photocopy of your passport information page. I did mine in colour, simply because it wasn’t much more money and looks way cooler
- A photocopy of your visa page. Once again, I did mine in colour
- A photocopy of your entry stamp into Spain. If you didn’t get an entry stamp (for example, if you entered in the UK), bring a photocopy of that along with whatever boarding passes or other proof you have for the date you entered Spain.
- Your empadronamiento certificate (your padrón) – this was the hardest item for me to get. Find out how to obtain your empadronamiento in Spain here.
- A filled out EX17 form, which is your application form. You can download EX17 here.
- A completed Model 790, Código 12, what you need to pay the associated fees. You can now fill this out online, which is best, since it will generate the barcode you need as part of the form. You can fill out the Model 790, Código 12 online. The option I selected was “TIE que documenta la primera concesión de la autorización de residencia temporal, de estancia o para trabajadores transfronterizos.”, which is for non-EU nationals applying for their first residency. It then auto-populates the fee to be paid at the bottom, which was just shy of 16 euros.
- Proof that the fees were paid from a bank. Once you have the Model 790 printed out, you can go down to a bank machine and pay your fees right at the machine. I had help doing it, but I think the options the lady pressed were related to bill payments, and eventually she had to scan the barcode. Make sure you keep the receipt, since that is proof you paid.
You’ll also need an appointment at the corresponding office. You can book an appointment for your TIE here. Choose the region where you live (for example, Valencia in my case), and then, for non-EU nationalities, the option you likely want is “Policia – Toma De Heullas (Expedicion de Tarjeta).”
Usually this will be the office for foreigners in whatever city you are in, but it’s quite possible it could be a police station in a smaller area. You should reserve your appointment online as soon as you have a rough idea of when you will be in town as often the appointments are a few weeks away. I booked mine from Canada the moment I received my visa back along with my NIE number (which is what you will need to reserve – not your passport number).
I booked my appointment for the early evening, which turned out to be a good decision because it was pretty quiet inside when I arrived. Some people bring along someone who speaks fluent Spanish – I didn’t bother. I figured I needed the practice anyways, and maybe they would go easier on me if just did it myself and tried to smile and be friendly.
After sitting for about two minutes, I was called up to the desk where a police officer sat. I told him, in Spanish, I was here to get my TIE card. He spread my documents out over the table, casually looked over them all, then started punching data into the computer. At one point he asked me to place my fingers into the finger print scanner and take a scan. Then he asked me to do it again, but this time roll them from side to side. Strangely though he only took scans of two of my fingers, one on each hand.
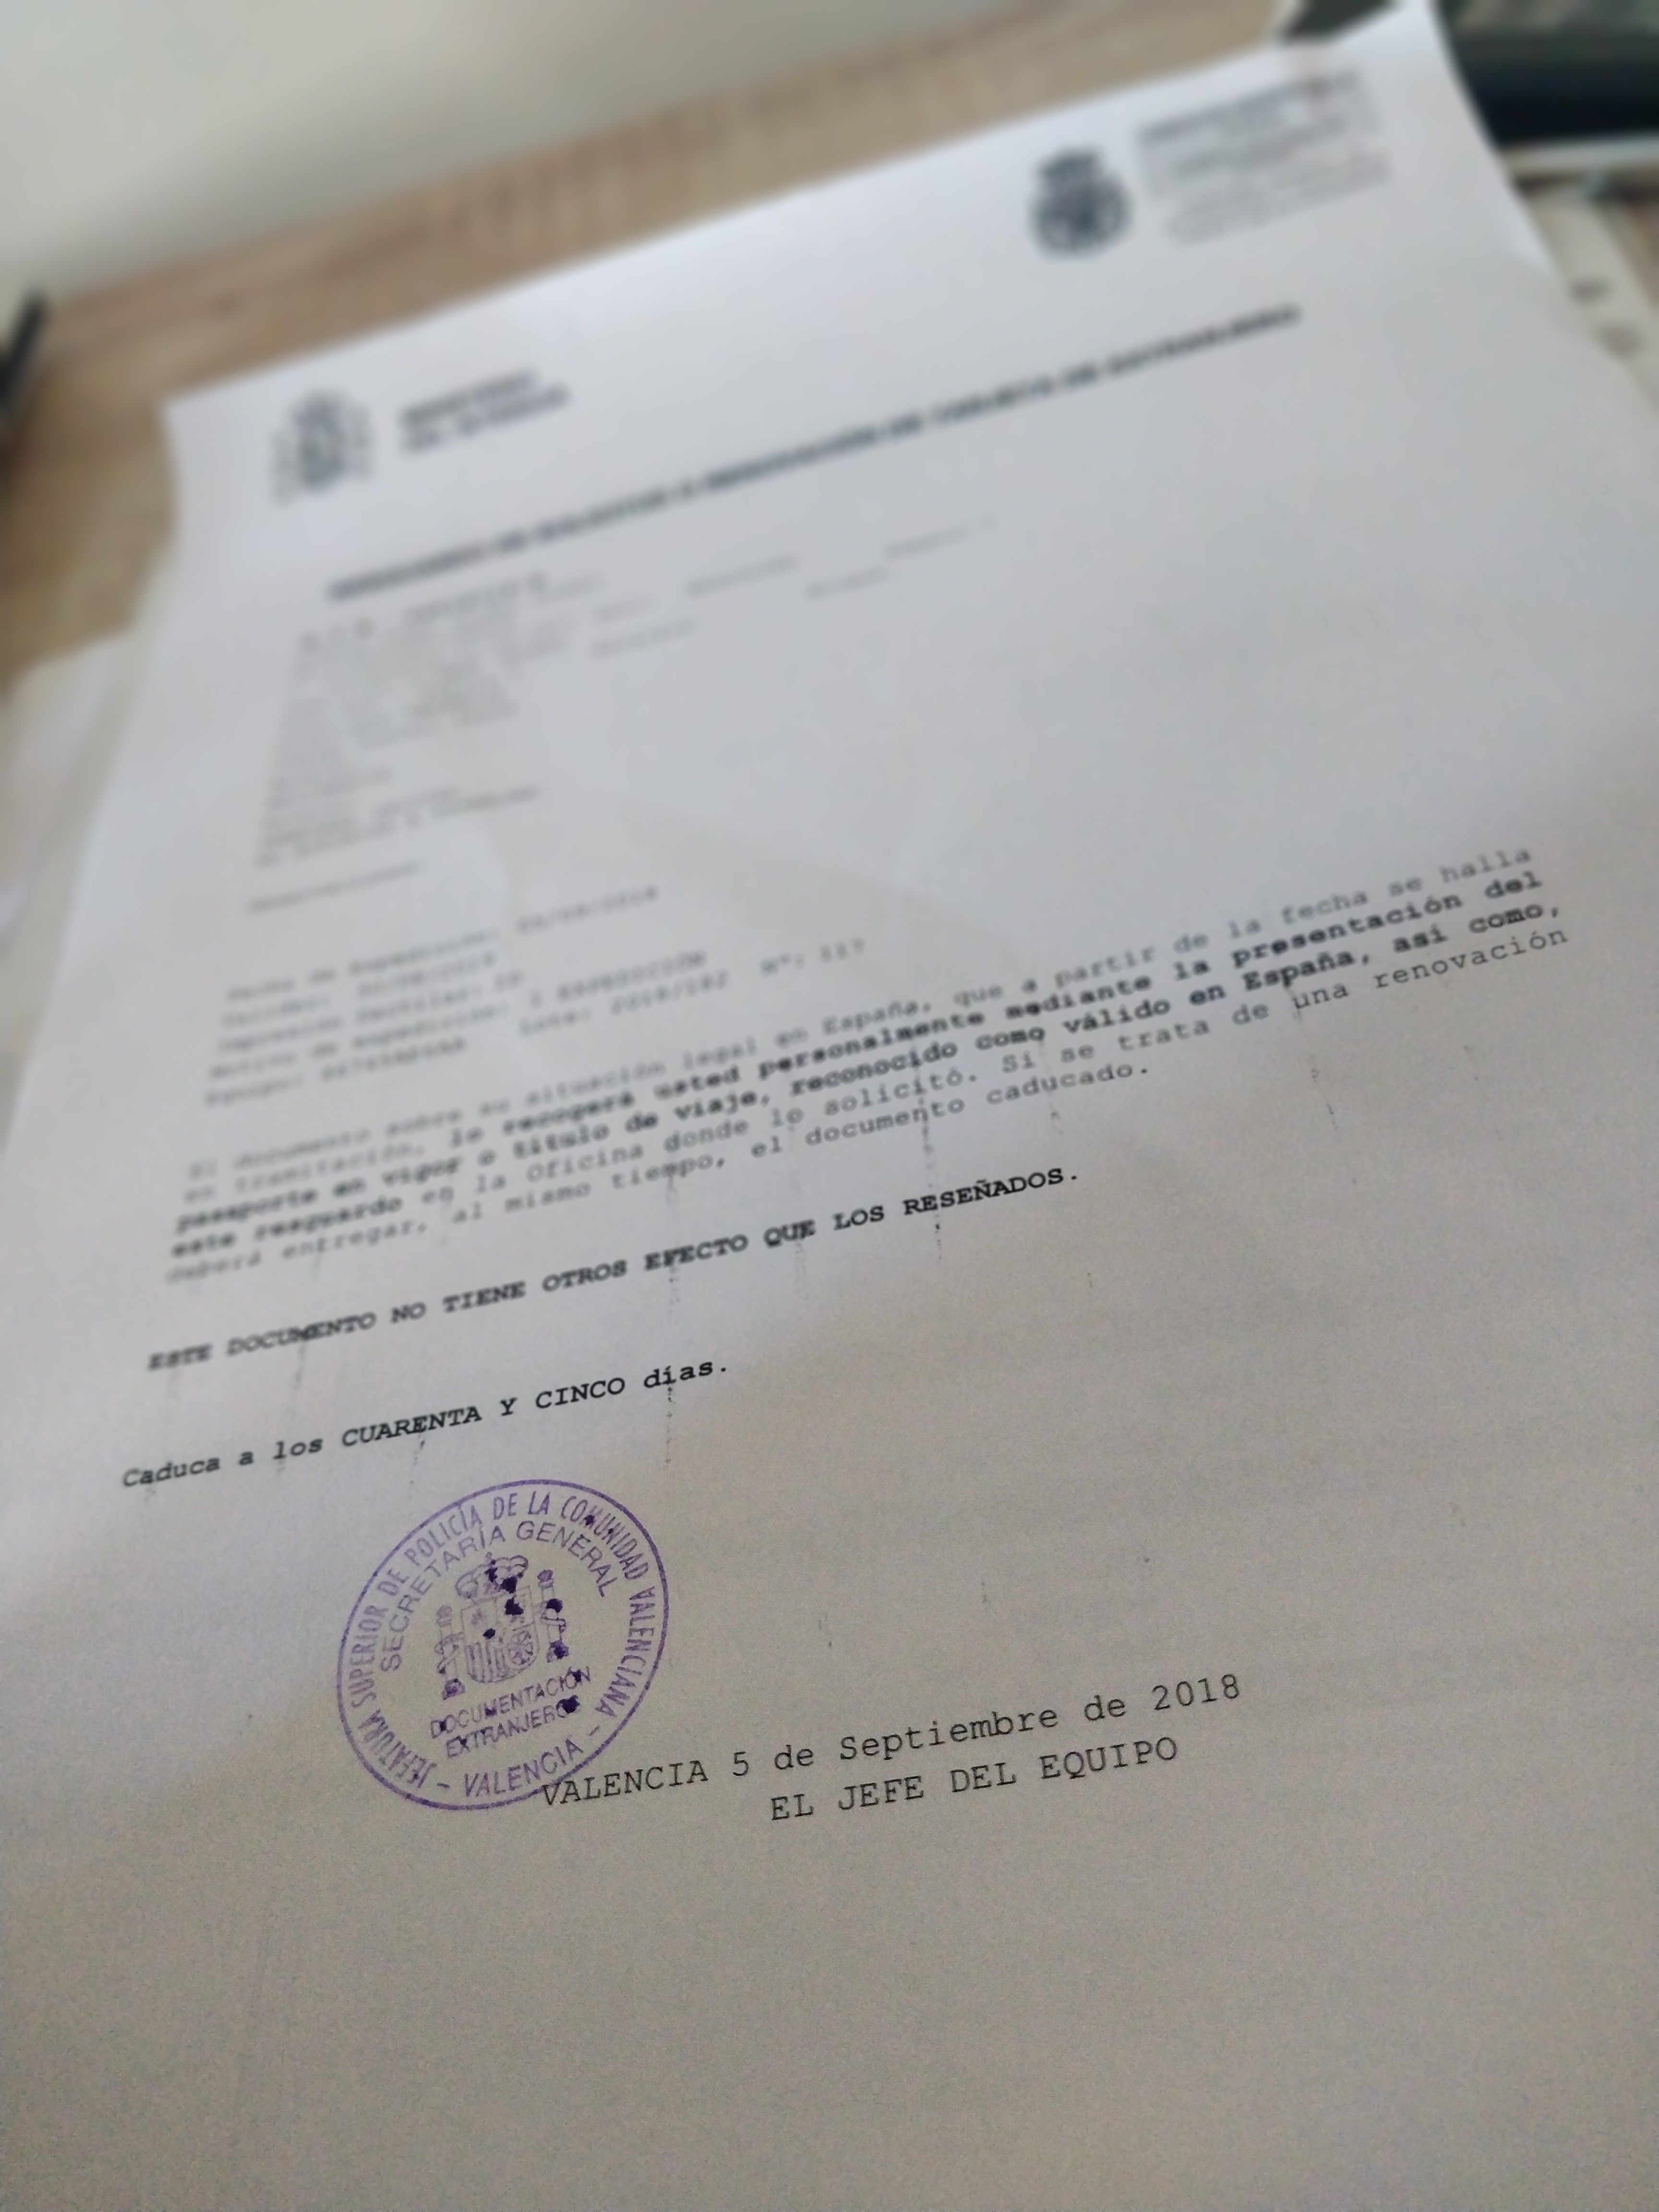
My residency authorization
Also I believe the only document he kept was the receipt for my payment and the application form. Everything else was returned to me.
Afterwards he gave me an official, stamped document that indicated I was a resident – this document was only valid for 45 days. I was told I need come back in 30 days, at which point my official card would be ready.The meeting itself was actually really easy, so if you are stressing out about it, try not to worry. The best way to ensure the process goes smoothly is to arrive with all your documents in perfect order.
I’ll pick up my card next week, so I’ll post a photo of that when I receive it. But in general this process went smoothly, so just make sure you are prepared when you arrive and you’ll do fine.
